

The other day I got an email from the quilt shop and decided at the last minute to take another class that was being run on the weekend. Titled “Metro Hoops/Metro Rings”, I thought it would be a great opportunity to finally learn how to sew a curved edge!
Prior to the class you had to choose which pattern you were going to make and with six of us attending we all coincidentally decided to do metro rings. We also had to buy a specific ruler that went with the pattern, a bit pricey, but worked great for these patterns (to be fair the ruler comes with an included pattern). The Quick Curve Ruler and Metro Ring pattern comes from Sew Kind of Wonderful, a company from the States started by three sisters (see http://www.sewkindofwonderful.com for more information).

Quick Curve Ruler and Metro Rings Class Fabric Prep.
Both patterns require 2 1/2” strips and I had planned on using scraps from my stash to learn how to create the block. Because I wasn’t sure how this pattern would work I did end up buying some new fabric but as I worked on the block throughout the day I really believe that this would be a great way to use up some scraps. All you need are strips of fabric at the minimum of about 7” – 10” in length, depending on how you want to develop the pattern for your project. The height of the ruler is 7” but you will need to include room to square up before you can make your first curved set. That first bit of waste is about 2 1/2”, leaving you room to make the 2 1/2” curve set. Having strips at about 10″ will let you make two sets but if you were doing a larger project and wanted to save waste you would use longer pieces to make multiple sets. The pattern suggests 20” strips which should give you about 7 identical strip sets. The longer the strips the less waste you have but more sets of identical strips.
Sewing the curve turned out to be pretty easy! Don’t be daunted by the awkwardness of how it sits while you are sewing and just focus on the fabric in front of the foot, making sure that just that bit lines up. Like magic it just ends up working out! My teacher suggested sewing the curved edge with the two sides of the fabric together and oriented so that the fabric on top makes a “C” shape.

Put the two pieces together so that the top piece forms a “C” shape. You wouldn’t sew these two pieces together but this is a good example of the shape I am trying to describe.
We learned about overlapping the edge to start, meaning that you want to leave about a quarter of an inch of overlap on the top fabric to account for starting the stitch on both fabrics at once. We did not use any pins but just manipulated the fabric by hand as it went through the foot. So easy and I got a great smooth curve every time.

Overlap the edge on top at the same width that you are sewing your seam (1/4″). You would begin sewing at the spot on the left where the two pieces meet. I didn’t line them up exactly so that you could see how the bottom was sitting compared to the top but normally you would match the curved edges of the two pieces together.
It was really interesting to see how other people in the class were using their fabrics and I thought all of the different blocks were so interesting. This is a really versatile block and I think that mixing and matching from scraps and different fabrics would make a really exciting quilt every time.

Finishing up the first block in class with a second on the go behind.
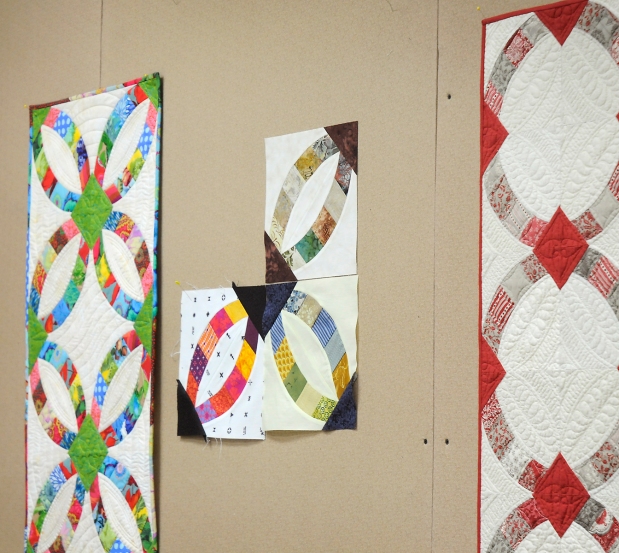
Block samples from my classmates and I with finished samples of the metro rings and metro hoop pattern on either side.
As I already have a lot of quilt projects on the go, originally I was going to make a table runner by using three of the blocks. I ended up only making two as I couldn’t decide if I wanted to make these into pillows instead or maybe some place mats. The problem is that the blocks are so beautiful that I don’t want them getting dirty with messy eaters! Time will tell what I decide to do but for now I am going to let them sit until I get some other projects finished.

Two finished 4-block units placed side by side.
I have another class coming up in April through SNAP where I will learn a Japanese dyeing technique called Arimatsu Shibori. I can’t wait to try my hand at dyeing fabric for a quilt!

I love classes it is lovely to learn new skills those blocks are beautiful! 😋
LikeLike
Thanks! How awesome would it look as a quilt! Sadly there was not enough of the background fabric to make a whole quilt but someday I definitely want to try this block on a larger scale.
LikeLike