Catching Up

It has been three months since we moved into the new house and two and a half months since I started my new job and I have been remiss with my posts. So I have decided that a quick catch up is in order!

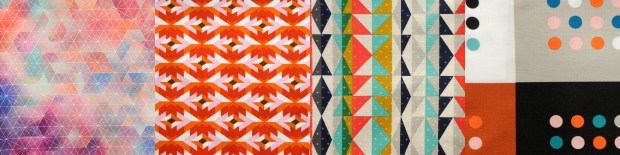
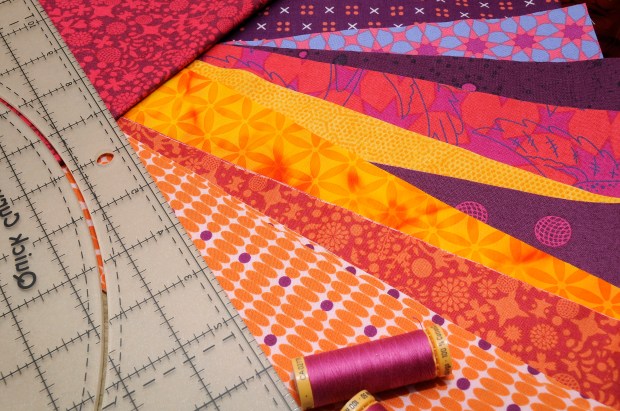
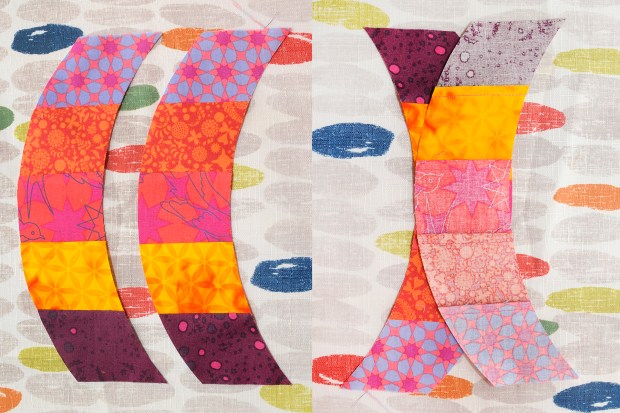
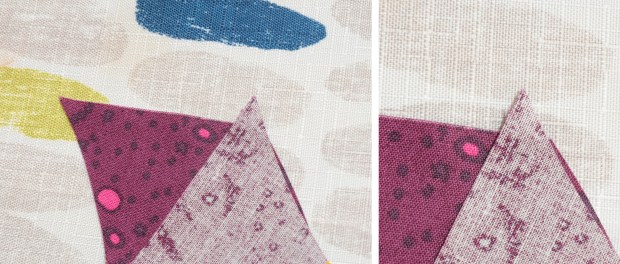
In the spring, right before the big move, I was working on designing some of my own patterns for fabric. This was such a fun project and allowed me to hone my illustration skills, helping me to find passion in graphic design and illustration again. Using my experience buying fabric at the quilt store, I wanted to try to make a collection of five or six patterns that would work together in an entire quilt. The toucan theme just popped into my head, pretty much fully formed, one night as I was falling asleep and woke up ready to give it a try. I am pretty excited about this and learned a lot in the process. There are many things I like about these patterns, things I would do differently next time, and many things I have yet to learn through more practice, I can’t wait! A new post will be coming in the future about incorporating my samples into a project to see how everything works together in reality.

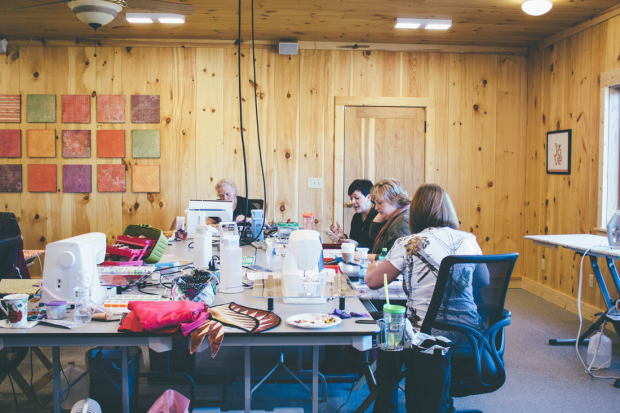
In June I took another terrific class through Fern’s School of Craft and had a chance to try my hand at Sashiko on a pre-made pillowcase provided at the beginning of the class. I have been wanting to try this and even bought a cute little kit while vacationing in Maui a few years ago, but it had since been sitting ignored in the closet. I found this class to be quite an easy exercise in stitching and I account this to my inclination towards hand quilting. We were given four different stitch patterns to choose from: Seikai Ha (Blue Ocean Wave), Yabane (Fletching), Juji-Tsunaji (Linked Crosses), and Shippo Tsunagi (Seven Treasures). I chose Juji-Tsunaji and love how it turned out. I will definitely be trying more of this and can’t wait to incorporate it into my quilting.

I love the new house so much for so many reasons but one of the most fantastic elements is that the house has provided me with the wonderful advantage of having my own art space! It is so great to have a space that I can just sit down and start working whenever I have the inclination. In the old apartment my stuff was everywhere and I was stuck working on projects on the dinning room table. It was a huge roadblock for my motivation to have to set up and take everything down anytime anyone came over, especially mid project, not to mention having no space to do anything else. Here I have a space dedicated to quilting and one for watercolour. No more sitting on the floor at the coffee table trying to paint!!! It’s amazing. I also have more spaces for storage and organization, the pièce de résistance being an antique cabinet from the 1920s where I can display all of my fabric for easy access, no more fabric shoved in plastic containers! Plus the cabinet has walnut wheels!!! I finally have a proper workspace and it has already brought me so much joy.

Quilt Space

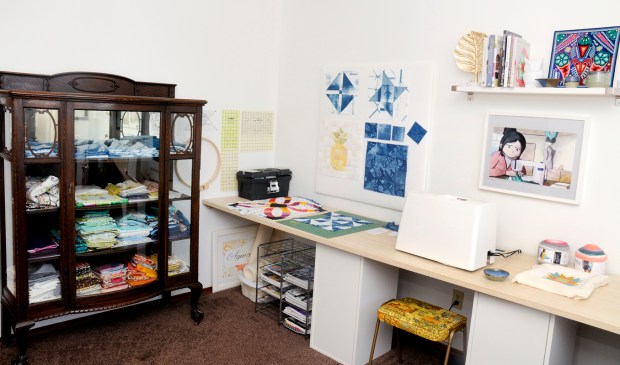
Quilt corner: Look at that beautiful cabinet.

That’s about it for now, I started hand quilting a quilt that I created using only fabric that I dyed myself with natural materials but was finding it a bit of a slog, so I am benching that for awhile while I work on other ideas. I am also exploring my own backyard and having a lot of successful experiments dyeing yarn with the trees and plants within it. Now I just have to figure out what to do with all of the yarn balls. Most likely a lot of fun quilt experiments are in my future!

1stPrize

One last thing, I ended up putting my quilt, “Snow in Grandmother’s Garden”, in at the fair and won 1st prize!

Advertisement

So Many Quilts, So Little Time

This weekend I had two quilts displayed in a quilt show, my first one! I was honoured to be asked to submit some of my quilts for the Vermilion Quilters Annual Quilt Show, put on by the Vermilion Quilters Guild this past weekend. It was an amazing event and there were so many beautiful and interesting quilts to check out!

Vermilion Quilters Guild Annual Quilt Show

My quilts! “Tofino” and “Snow in Grandmother’s Garden”. Vermilion Quilters Guild Annual Quilt Show.

When we first walked in, we were greeted by two quilters at the door and a corridor full of charity quilts made for organizations such as the Cross Cancer Institute and Quilts of Valour (www.quiltsofvalour.ca). There were also some very impressive door prizes to tempt me!

Then we entered the main hall and I was awestruck by the number of quilts to look at. Of course I wanted to find mine first! 🙂 They were nestled in nicely in the middle beside some beautifully designed and coloured quilts and it was so exciting to see them displayed, having people walking by and stopping to take a look.

Vermilion Quilters Guild Annual Quilt Show

Vermilion Quilters Guild Annual Quilt Show

Quilt in the foreground: “Aviatrix Medallion” by Carol Wasylik, designed by Elizabeth Hartman and quilted by Extraordinary Extras.

Vermilion Quilters Guild Annual Quilt Show

There wasn’t a name attached to the label on this quilt but it is stunning!

For the viewer’s choice ballot, there were three categories: large quilts, small quilts, and the quilter’s challenge quilts. I ended up choosing a lovely large appliquéd quilt with yoyo flowers (who doesn’t love a yoyo flower?), a small quilt that had been batik dyed, and a challenge quilt where I thought the quilter did a good job of working through a colour palette that they initially were not very excited about.

Vermilion Quilters Guild Annual Quilt Show

“Circle of Flowers” by Barb Spurgeon, quilted by Melissa Martens.

Vermilion Quilters Guild Annual Quilt Show

“Cattitude” dyed and quilted by Cindi Plant, pattern image by Laurel Burch.

Vermilion Quilters Guild Annual Quilt Show

“Lone Star” by Lyn Yaremchuk, designed by Swirly Girls. Right: Detail of the challenge fabrics that had to be used in the quilt.

As with any art exhibit, I took my time, looking at a quilt close up and then moving back to see it as a whole, as well as making a couple of passes through the show, noticing something new with each pass.

I can really appreciate the massive amount of work it took to organize this event. There was live music and a lunch counter and I was pretty happy that there were tables and chairs set up so I could rest and agonize over who to vote for. It was really great to browse and chat with everyone and there was a palpable sense of community and support that I could see and feel. I am so excited to have had the chance to participate and found it super inspiring to see other quilters’ work, feeling challenged to up my game and try some new designs, especially to use more colour!


Quilt-ebago: Adventures in the Land of Summer

Whew! June was a very busy month for me, as I had picked up two extra contracts on top of my regular job, and by the time July came around I was in desperate need of a vacation. So I headed west to wine country and spent my days in the wineries (just tasting of course) and my nights in an air-conditioned hotel room watching HGTV. I had two missions for the trip, rent a paddleboard for a morning and get out on the lake, and get to a quilt shop.

I love my local quilt store and am very loyal to it but at my last class I came to a realization. As the woman teaching the class was showing us samples of work, I could see where I had that fabric, and that fabric over there, oh and I used that fabric in a baby quilt just last year. It dawned on me that everyone who shops at this store will all have similar fabric in one way or another in their quilts. I knew I needed to diversify. Stat.

I have a co-worker whose sister and her friends are very into quilting, they have even bought a longarm machine shared amongst them, and they recently travelled to the States for a big quilt conference that happens twice a year. They were sending back photos constantly during their trip, not only of the conference but of all of the quilt shops they stopped in along the way. This got me thinking again about quilt communities and building connections outside of my little world.

Mix

My new fabrics included floral, animal, and geometric patterns in a variety of colours.

I ended up stopping by Cherry Tree Quilts in Summerland and went a little nuts. I didn’t have anything specific in mind in terms of fabric or project, I just wanted to add some variety to my stash at home, so I just started working my way through the store and pulling fabrics that I was attracted to.

Geometrics Detail

Different geometric patterns to play with and get inspiration from.

I ended up getting a few fabrics cut in 1 metre lengths but most were in ½ metre bundles and while most will be secondary or supplementary fabrics, a few of these are definitely going to be the star of the show. I’ve broken them down into categories of pattern type-floral, animal, coloured gradients, and geometric-but these fabrics show a lot of potential inspiration for colour pairing with fabrics I already have or will challenge me to use a colour palette that I wouldn’t naturally gravitate to.

Colour Gradients Detail

Fun colour block fabrics that include gradients and gold squares.

While my regular quilt store is definitely still my number one go-to when it comes to fabric and classes, I am quite pleased with my new additions and I look forward to challenging myself to use these new fabrics instead of losing them to the abyss of the quilter’s stash.

Florals Detail 4

Florals!

Learning Curve

The other day I got an email from the quilt shop and decided at the last minute to take another class that was being run on the weekend. Titled “Metro Hoops/Metro Rings”, I thought it would be a great opportunity to finally learn how to sew a curved edge!

Prior to the class you had to choose which pattern you were going to make and with six of us attending we all coincidentally decided to do metro rings. We also had to buy a specific ruler that went with the pattern, a bit pricey, but worked great for these patterns (to be fair the ruler comes with an included pattern). The Quick Curve Ruler and Metro Ring pattern comes from Sew Kind of Wonderful, a company from the States started by three sisters (see http://www.sewkindofwonderful.com for more information).

Metro Rings Class Preparation2.jpg

Quick Curve Ruler and Metro Rings Class Fabric Prep.

Both patterns require 2 1/2” strips and I had planned on using scraps from my stash to learn how to create the block. Because I wasn’t sure how this pattern would work I did end up buying some new fabric but as I worked on the block throughout the day I really believe that this would be a great way to use up some scraps. All you need are strips of fabric at the minimum of about 7” – 10” in length, depending on how you want to develop the pattern for your project. The height of the ruler is 7” but you will need to include room to square up before you can make your first curved set. That first bit of waste is about 2 1/2”, leaving you room to make the 2 1/2” curve set. Having strips at about 10″ will let you make two sets but if you were doing a larger project and wanted to save waste you would use longer pieces to make multiple sets. The pattern suggests 20” strips which should give you about 7 identical strip sets. The longer the strips the less waste you have but more sets of identical strips.

Sewing the curve turned out to be pretty easy! Don’t be daunted by the awkwardness of how it sits while you are sewing and just focus on the fabric in front of the foot, making sure that just that bit lines up. Like magic it just ends up working out! My teacher suggested sewing the curved edge with the two sides of the fabric together and oriented so that the fabric on top makes a “C” shape.

metro-rings-sewing-a-curve3

Put the two pieces together so that the top piece forms a “C” shape. You wouldn’t sew these two pieces together but this is a good example of the shape I am trying to describe.

We learned about overlapping the edge to start, meaning that you want to leave about a quarter of an inch of overlap on the top fabric to account for starting the stitch on both fabrics at once. We did not use any pins but just manipulated the fabric by hand as it went through the foot. So easy and I got a great smooth curve every time.

metro-rings-sewing-a-curve2

Overlap the edge on top at the same width that you are sewing your seam (1/4″). You would begin sewing at the spot on the left where the two pieces meet. I didn’t line them up exactly so that you could see how the bottom was sitting compared to the top but normally you would match the curved edges of the two pieces together.

It was really interesting to see how other people in the class were using their fabrics and I thought all of the different blocks were so interesting. This is a really versatile block and I think that mixing and matching from scraps and different fabrics would make a really exciting quilt every time.

metro-rings-class2

Finishing up the first block in class with a second on the go behind.

metro-rings-class4

Block samples from my classmates and I with finished samples of the metro rings and metro hoop pattern on either side.

As I already have a lot of quilt projects on the go, originally I was going to make a table runner by using three of the blocks. I ended up only making two as I couldn’t decide if I wanted to make these into pillows instead or maybe some place mats. The problem is that the blocks are so beautiful that I don’t want them getting dirty with messy eaters! Time will tell what I decide to do but for now I am going to let them sit until I get some other projects finished.

metro-rings-final-squares

Two finished 4-block units placed side by side.

I have another class coming up in April through SNAP where I will learn a Japanese dyeing technique called Arimatsu Shibori. I can’t wait to try my hand at dyeing fabric for a quilt!

It Takes A Village: Quilt Communities

Lately I’ve been feeling a bit dissatisfied with my “laziness” when it comes to the technical aspects of quilt production and so decided to take a class through my local quilt shop, Earthly Goods, in hopes it would get me back on track. The class, titled “Rotary Cutting Basics + More”, is a beginner class teaching burgeoning quilters the basics of measuring, cutting, and making the perfect ¼” seam. My teacher was bit surprised to see me but I really felt like this was the perfect time for a review. I got so much out of the class and it’s really gotten me thinking about the social aspect of quilters and the communities they build.

In the first ten minutes of the class I had felt I had already gotten my money’s worth as it became quite clear that my rotary cutter was severely lacking in it’s effectiveness…I was missing a piece and my blade was on the wrong side! How embarrassing. 🙂 I’m not sure how this happened but both problems must have stemmed from the very first time I tried to change a blade. The piece missing was a large yellow washer resulting in my blade being loose and wobbly. I had also switched the side of the blade on the cutter so that I was using it as a left-handed quilter would, which I am not. No wonder I wasn’t happy with my cutting! We also learned how to use and care for our cutting mats and rulers. And I finally figured out how to use all of the diagonal lines on my Omnigrid.

Having quilted for a few years now I also came to the class equipped with questions about continuing issues with my sewing machine, something I would not have been prepared with if I was a beginner quilter.

timberhaze-retreat

Try taking a class or going on a retreat! Image taken from the Timberhaze Retreat Website. http://timberhazeretreat.com/quilting-retreat/

As a solitary quilter, this class has really gotten me thinking about the benefits of taking an active part in quilt culture. Check out your local quilt store and find out the local guilds in your area. A quick Google search will show you a whole world of quilt retreats and vacations (quilt cruise!) and don’t forget to keep your eyes peeled for any exhibits and shows that might be in the works.

saqa-2016-conference

Image from the SAQA 2016 Conference. Image taken from http://craftindustryalliance.org/saqa-conference-report/