Stitching in the Small

I have been interested in embroidery for a few years now but was finding that even with all of the books I was reading, I just wasn’t sitting down and doing it. I have found that when it comes to trying new artistic pursuits, an in-person guiding hand is what I need!

I took this class through Fern’s School of Craft (www.fernsschoolofcraft.com), taught by Alex from Florals and Floss Embroidery (www.instagram.com/floralsandflossembroidery). In one afternoon we learnt 6 different stitches and I was enamoured by the hands-on quality, beautiful colours, and texture of the embroidered floss threads. Plus, embroidery instantly gets me relaxed and in a quiet state of mind. I love the immediacy of embroidery and how a project can be finished quite quickly.

In this class I made a cute little floral hoop with my niece’s name on it for her upcoming 2nd birthday and it turned out so pretty and great. I can’t wait to start coming up with my own designs and playing with some new stitches!

Fern'sFlossandFloralsEmbroideryClass5

Advertisement

Learning the Ropes

A few weeks ago I mentioned an upcoming punch needle rug hooking class with Fern’s School of Craft and I just had to share some pictures with you. I highly recommend checking out this technique if you get a chance!

I love the hands-on quality and portability for a project like this, and for someone like me who quilts by hand, it’s a pretty quick turn around (at least for something this size).

Fern showed us a bit about rug hooking the traditional way with a rug hook needle, but I really enjoyed using the punch needle. We used The Oxford Punch Needle #10 and I think it’s the perfect instrument for this.

Punch Needle Class

With our monk’s cloth stretched on a wood frame we got to it. Fern had a variety of designs to choose from or we could draw something ourselves and after much deliberation I drew out this quilt square. I don’t know it’s name but my guess is it may be a variation of a shoofly? I would love to know if anyone has seen this before!

Punch Needle Class

Table full of yarn, plus check out the cutest watermelon slice ever!

I’m definitely going to have to work on cleaning up my stitches and getting the density just right (they’re a bit close) but I look forward to getting more practice in on the next one. I finished up the background when I got home and voila!

Finished Punch Needle Rug Hooking Back & Front

The image on the left is traditionally the “back”, with the image on the right looking more rug-like. I like how clean the left version is though, so will probably make that my “front”. 🙂

I’m currently in the process of moving so have been busy packing up the apartment. The new house will have a dedicated office/studio space just for me, so I’m trying to decide if I want to turn this into a pillow or keep it as a piece to hang on the wall in my new studio. Either way I will probably turn the edges in and make a yarn stitched binding. Yay!

Adventures on the Loom

This weekend I’m so excited to be taking a beginner rug hooking class through Fern’s School of Craft (check it out at www.fernsschoolofcraft.com). This will be my second class with Fern, the first being about a month ago when I learned how to weave on a floor loom. It was such a fun experience and I can’t wait to see what this weekend brings.

Fern’s weaving class included a mix of theory (project prep, loom set up, etc.) interspersed with actually sitting down at the loom to create. The goal for the class was to weave a length of cloth, which we then turned into a pillow. This is the reason why I wanted to take the class; I can’t imagine what to do with a piece of weaved cloth. What do I use it for? I don’t need another scarf and am not the table runner type…for now at least. Being able to make something I would use or make more of in the future is what in the end made me think that this was the class for me. This is going to sound crazy but I didn’t even know you could sew a woven cloth…don’t judge me!

Weaving

Getting comfortable on the loom.

Fern has been weaving for over 10 years and is finishing up her second year, of five, of the Master Weaver program at Old’s College – it sounds intense! She is an enthusiastic artist, both in textiles and photography, and is great at making everyone feel welcome and at ease, which made her class really fun and relaxed. The class size was small, with five students in total, and we each got our own loom for the day. There was no waiting and plenty of materials for everyone, allowing us to really get into a flow.

In the way that Fern teaches, we were able to have complete control over how we wanted our experience with weaving to be. I wanted to experiment and see what would happen by changing the treadle order multiple times throughout the project and got some pretty weird, but cool, designs, while others were more comfortable using the same motif and experimenting solely with colour. Either way the result was a really beautifully patterned finished product. It was so interesting to see everyone’s finished pillows, especially all of the different colour palettes!

On the loom

Playing around with different treadle combinations to see what would happen…

Apart from colour, Fern had many different types and weights of yarn to choose from and you can see in my orange stripe how a textured yarn looks when woven. It’s amazing to think about all of the many decisions that go into a final woven piece.

Finished Pillow Weaving

My pillow on the new living room chair.

I ended the class really excited about the process of weaving and am inspired to try more of it in the future. In the meantime, onward to rug hooking!

So Many Quilts, So Little Time

This weekend I had two quilts displayed in a quilt show, my first one! I was honoured to be asked to submit some of my quilts for the Vermilion Quilters Annual Quilt Show, put on by the Vermilion Quilters Guild this past weekend. It was an amazing event and there were so many beautiful and interesting quilts to check out!

Vermilion Quilters Guild Annual Quilt Show

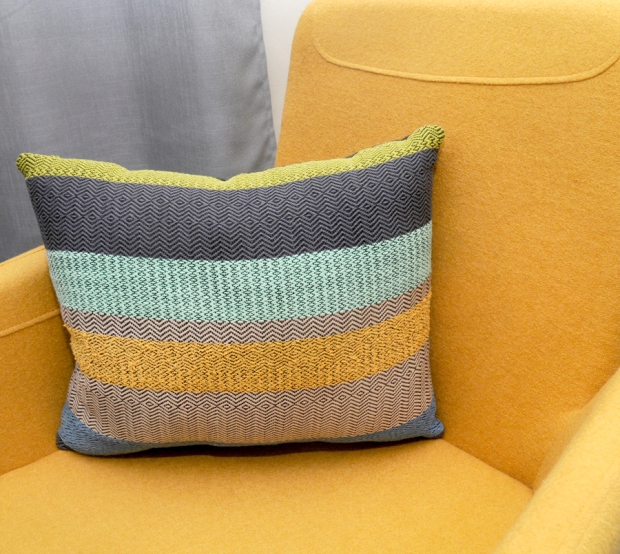
My quilts! “Tofino” and “Snow in Grandmother’s Garden”. Vermilion Quilters Guild Annual Quilt Show.

When we first walked in, we were greeted by two quilters at the door and a corridor full of charity quilts made for organizations such as the Cross Cancer Institute and Quilts of Valour (www.quiltsofvalour.ca). There were also some very impressive door prizes to tempt me!

Then we entered the main hall and I was awestruck by the number of quilts to look at. Of course I wanted to find mine first! 🙂 They were nestled in nicely in the middle beside some beautifully designed and coloured quilts and it was so exciting to see them displayed, having people walking by and stopping to take a look.

Vermilion Quilters Guild Annual Quilt Show

Vermilion Quilters Guild Annual Quilt Show

Quilt in the foreground: “Aviatrix Medallion” by Carol Wasylik, designed by Elizabeth Hartman and quilted by Extraordinary Extras.

Vermilion Quilters Guild Annual Quilt Show

There wasn’t a name attached to the label on this quilt but it is stunning!

For the viewer’s choice ballot, there were three categories: large quilts, small quilts, and the quilter’s challenge quilts. I ended up choosing a lovely large appliquéd quilt with yoyo flowers (who doesn’t love a yoyo flower?), a small quilt that had been batik dyed, and a challenge quilt where I thought the quilter did a good job of working through a colour palette that they initially were not very excited about.

Vermilion Quilters Guild Annual Quilt Show

“Circle of Flowers” by Barb Spurgeon, quilted by Melissa Martens.

Vermilion Quilters Guild Annual Quilt Show

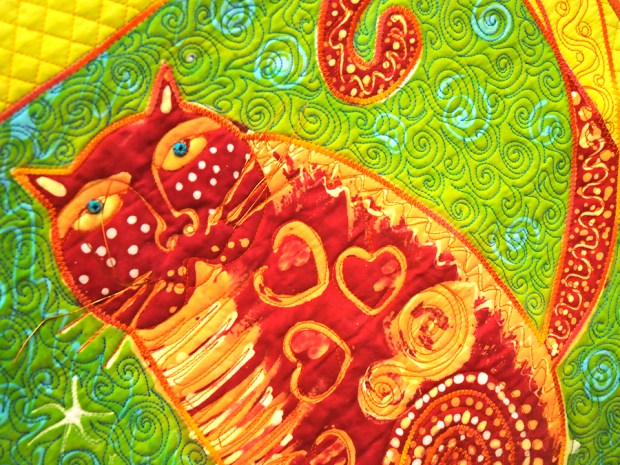
“Cattitude” dyed and quilted by Cindi Plant, pattern image by Laurel Burch.

Vermilion Quilters Guild Annual Quilt Show

“Lone Star” by Lyn Yaremchuk, designed by Swirly Girls. Right: Detail of the challenge fabrics that had to be used in the quilt.

As with any art exhibit, I took my time, looking at a quilt close up and then moving back to see it as a whole, as well as making a couple of passes through the show, noticing something new with each pass.

I can really appreciate the massive amount of work it took to organize this event. There was live music and a lunch counter and I was pretty happy that there were tables and chairs set up so I could rest and agonize over who to vote for. It was really great to browse and chat with everyone and there was a palpable sense of community and support that I could see and feel. I am so excited to have had the chance to participate and found it super inspiring to see other quilters’ work, feeling challenged to up my game and try some new designs, especially to use more colour!


Let The Great Rust Experiment Begin!

I decided the other day that I wanted to try dyeing fabric with rust so I sent my partner in crime out to the family acreage, always a good place to find rusty bits, on a very important mission to collect various rusted objects from the workshop. What came back to me was a myriad of flotsam and jetsam made up of washers, springs, hooks, and rings.

I still have a few cotton pieces from my last go at indigo dyeing, so I donated a piece from the stash for science. Using some of my precious creamy earl grey tea that I steeped for about 20 minutes in a large metal bowl, and while still warm, I soaked the fabric in it. Laying the fabric out in an aluminum-roasting pan I then proceeded to place the rusted pieces in a way that I thought would make a nice pattern, sprayed the whole thing with the leftover tea, now in a spray bottle, and covered with a plastic bag.

I let this sit for a few days, occasionally spraying it to make sure that everything was still wet, and when I couldn’t stand to wait any longer, removed the cotton piece for a look-see. I loved it!

Before and After

Before and After: On the left is the pre-washed and pre-ironed piece, probably still a bit wet. On the right is after rinsing with a gentle soap, left out to dry, and then ironed.

Because I wasn’t sure, and am still not, what I was going to do with it in the end I decided to give it a rinse with some gentle non toxic soap and, after drying, ironed it with trepidation (I am hoping I didn’t wreck the iron). I can definitely see how I lost detail and colour after rinsing but if I am going to eventually use this in a quilt I need it to be clean.

Rust Details

Details of some of the rust dyed elements on the fabric.

I really like this effect but I have so many questions! How much will this process, and the fact that there is still rust sitting on and in the fibre, continue to degrade the cotton piece? How will this affect other fabrics placed next to it? And how colourfast will this be over time? Fortunately I have a weekend workshop on natural dyeing at ACAD (Alberta College of Art & Design) coming up in a few weeks so I am hoping to pick my instructor’s brain and get a better idea of this process and best use of it for future projects!

An Unexpected Surprise

So I haven’t been very good at posting lately but I promise it’s not because I have been idle! I have a quilt that has been “In Progress” for years and I finally bit the bullet and said no more projects until this one is done. It’s been so hard! I have so many project ideas!

Needless to say, I have nothing really new to add as of late until it gets finished. Instead I am going to do a quick post on a crazy cool exhibit I saw in Toronto this summer at the Textile Museum of Canada (http://www.textilemuseum.ca/). The museum, right downtown and tucked into a little side street, is such an interesting little space, and easy to miss if you aren’t looking for it!

I was hoping to see some interesting quilts but what really blew my mind was the exhibit, “Huicholes: A People Walking Towards the Light, Wixarika Art by José Benítez Sánchez”. These yarn paintings were really so breathtaking, and quite large!

Kauymari, the Wind and the Word

Kauymari, the Wind and the Word by José Benítez Sánchez, 2005. The caption accompanying the piece reads “Tamatsi Kauyumari (Our Elder Brother, He Who Does Not Even Know His Name) is the god of the word as he is the one who taught the Huichol people to name things. At the centre of this yarn painting, we see Kauyumari in the form of the deer that taught the believers the language they hear at the sacred sites. According to Sánchez, before Kauyumari taught them language, ‘the entire world spoke badly.'” I think it’s so great how the various languages spilling out of the mouths is depicted!

These pieces are made by taking a piece of wooden board, covering it in a layer of beeswax, and then pressing yarn into the wax to make a highly detailed and colourful image. Other art pieces included very intricate beadwork, and such an exciting and remarkable texture is created when the beads cover an entire sculptural piece.

Tamatsi Kauyumari: Our Elder Brother, He Who Does Not Even Know His Name

Accompanying exhibit caption: “Tamatsi Kauyumari, also known as the Blue Deer, is the cultural hero of the Huichol. As he is an ambivalent being, he is associated with the morning and evening star.” This caption goes on to describe how Tamatsi Kauyumari was turned into a deer, and how pilgrims to the desert in a traditional yearly pilgrimage are able to interact with him through the consumption of peyote.

These pieces are filled with symbolism and imagery special to the Huicholes people and their culture and it was a pleasure to get a glimpse into their worldview.

For more information I bought a book in the gift shop that went with the exhibit “Yarn Paintings of the Huichol” by Hope Maclean.

Beaded Bowl

As captioned at the exhibit, “This artisanal bowl is made from a gourd. It was inspired by a ritual bowl.”